Tuesday, June 24, 2008

Ali's Kitchen: Rosemary Pork Chops and "Ratatouille"

Hello, culinary swashbucklers! We meet again. Let's see what we're dealing with this week.

The problem: You went on vacation and threw out most of the contents of your fridge beforehand. You are left with: Some frozen pork chops; a few lemons; huge bunches of rosemary and thyme (from the Cornish hen) (now essentially dried); and some fingerling potatoes that are going to sprout soon. And garlic and olive oil. There's always garlic and olive oil around these here parts.

The solution: A quick search on Epicurious! This particular search should yield something along the lines of:

Rosemary Pork Chops
(Which is entirely comprised of the following:)
3 garlic cloves
2 teaspoons coarsely chopped rosemary*
3 tablespoons olive oil**
4 (1/2-inch-thick) bone-in rib pork chops (1 1/2 pounds)
Accompaniment: lemon wedges

* I didn't keep track of how much rosemary I used. I have a little set of glass mixing bowls and filled the one that looks like... oh... about an eighth of a cup? More? I don't know. Go wild! Also, we're adding some thyme, simply because we have so damn much.
** I used about 2 Tbsp, max. It was more than enough, as usual.

This recipe also includes the helpful hint: "Rosemary and garlic give these succulent pork chops Mediterranean flair." As far as a side dish, what's more Mediterranean (a.k.a. Greek) than cucumbers? Except cucumbers suck, as far as I'm concerned, so we're going with some simple zucchini (sort of like a cucumber) sauteed with pignoles. Hey, Italy's on the Mediterranean. So go buy some zucchini and pine nuts! Here we go:

Crank that broiler up, and don't forget to pre-heat the broiler PAN as well. If you're like me and have been banned from using a grill by persons who shall remain nameless, then you're looking at a lot of broiling this summer. Awesome. Nothing says summer like a 500+ degree kitchen.

While the broiler's heating, remember to thaw your pork and get it to approximately room temperature so it cooks evenly. We're using boneless pork chops here, so I'm guessing the cook time will be shorter than that stated in the recipe. THAT time is 4 minutes per side, plus 8 minutes' worth "sitting time," so we'll eyeball it. The last thing we want, after all, is trichina worms.

During this time you can:
* "Mince and mash the garlic to a paste with a pinch of salt, then stir together with rosemary, oil, 3/4 teaspoon salt, and 1/2 teaspoon pepper. Rub mixture all over chops," as the Epicures have it. Deal with it, Ali: You're going to have stinky fingers after this one. Anyway, it'll be worth it. Look at 'em:


Looks tasty, no?


The mixture isn't so much "paste-" like, but sue me, because I don't have a mortar. Anyway, there's no pleasing everyone here. Look at all that garlic: I know a certain sous chef who's NOT going to be happy about this...


No fair. I no can has garlik.


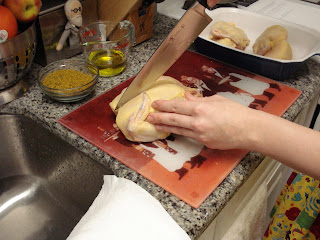
* Chop up your zucchini. Start by slicing lengthwise, then choppy chop chop all the way down the stalk.


Watch your little fingers!


* Gaze at the heirloom tomatoes in your fridge and wonder: a) if they're coated with salmonella, and b) if they'd taste good as a sort-of-ratatouille with the zucchini. Decide: Probably Not, and Probably, respectively. OMG! You are suddenly making a sort-of-ratatouille thing!

Zucchini + Tomatoes = Who's excited?!


Even though they're a little mealy from being in the fridge for almost a week (mealy is better than fruit flies welcoming us home from Vegas), the tomatoes smell flavorful and look preeetty. See?


I can feel a canker sore forming just from LOOKING at this many tomatoes

* Get EXTRA lazy and steam your potatoes so you don't have to Google how long to roast fingerling potatoes at broiler heat. Start boiling the water now, and remember to scrub off the potatoes because they grow in the GROUND, PEOPLE. And while there may be lots of minerals in soil, it feels... icky between one's teeth, non?

* Measure out some pignoles. Don't go overboard - you just want enough to add some rich flavor to the otherwise plain sauteed zucchini and tomatoes. If you're like me, sautee the pignoles a little before you toss the zucchini (at M-H heat), then tomatoes, into the pan. Because, if you're like me, you don't understand the laws of physics, and are oblivious of the fact that the pine nuts are small enough to fall through and beneath the veggies, and therefore still get nice and toasted. Therefore, if you're like me, you'll end up with some overcooked pine nuts. Occasionally stir your zucchini, then when it's about halfway done, add the tomatoes. Don't cover, or it will get soggy!

* Ponder the irony of e. coli and salmonella being found overwhelmingly in "healthy" foods like spinach and tomatoes, while the beef industry has somehow managed not to kill anyone with those particular pathogens in the recent past. Also ponder the law of averages and likelihoods, and wonder if you should cook the pork extra hot, because, doesn't it just seem like time for meat to get on the bandwagon?


* Quick interlude: You know that car commercial that uses the St. Crispin's Day speech from Henry V? ("We few, we happy few, we band of brothers," etc.) My husband just correctly identified it as the St. Crispin's Day speech. My husband. Wut??? (Hot.) (Not hot: When my husband leaves his plate on the table later and jumps on the phone with his father when I'm cleaning up. Then, when I ask him to bring his plate to the dishwasher, leaves it on the counter without even rinsing it. Bad boy.)

Time for the Main Event.
Pop those four succulent pork chops in the broiler. Let's try four minutes on each side... Okay, not quite enough. Let's try two more minutes on the first side...

Oh, and don't do what I did: Almost burn yourself to death while flipping the chops over a second time (weren't done enough to bring out and cool), then putting the grill pan in semi-sideways, at which point it slipped to the bottom of the broiler. Then I very intelligently plopped my oven mitt-clad hand in to grab it, realizing that the thumb side VERY NEARLY made contact with the blue-hot flames. Whoever thinks a TINY GRILL is more dangerous than a RAGING HOT BROILER is absolutely deluding themselves. But don't even get me started on that...

Here we are, the final result:


Oddly monochromatic, yes?


(Keep in mind the meat portion won't be as large as it looks here - pork chops are surrounded by a thin ring of fat, and usually one fatty end. Depending on your tastes, may not end up in your belly. Between me, Tarot and K, we didn't manage to finish both of mine here. It's tough cooking for two when you're really honest about whether or not you'll actually end up eating it for leftovers.)

The Result, and some Final Notes.


* Rosemary (and Thyme) Pork Chops: Oops. I overcooked it. As usual. I was deceived by the "pink" left in it when I was SUPPOSED to take it out. Otherwise, YUM! Tastes almost lemony, which I guess must be the rosemary, as I'm not using my decorative lemon slices.

* "Ratatouille" Thing: Pretty good. Should have started it a little later (started it a few minutes before putting the pork in the broiler). Next time I make this I will: a) Use Feta or Parmesan instead of pignoles - should sauce it up a little! b) Not use so many tomatoes - they masked the flavor of the zucchini. c) Make this dish when I have some onions lying around. THAT would be yummy!

* Potatoes: What's not to like about potatoes? I didn't even pay attention to how long they steamed. I don't think you can really over-steam potatoes. At least, not in MY kitchen you can't!

Thus ends another mostly successful foray into the culinary arts. Next time... well, who knows? Possibly Turkish lamb kabobs! Mmm!

Post-Evening-Snack Note: Sprinkling some Parmesan on the "ratatouille" really helped. Zing!

Sunday, June 8, 2008

Ali's Kitchen: Spice-Roasted Cornish Hens with [abridged] Spring Garlic Jus... another really long post

This evening's recipe includes one of my favorite ingredients: Cornish hens. I love to cook them. It's like cooking a less-intimidating version of a real hen. Our recipe also calls for over ten herbs and spices - another plus in my book. This meal goes well with a simple green salad and some unadorned Israeli couscous (which is not, technically couscous, but pasta).

Here's the ingredient list for our main dish, courtesy of the New York Times:

1 tablespoon thyme leaves
1 tablespoon rosemary leaves
1 tablespoon cumin seeds
1 bird’s eye chili pepper, chopped (optional)
1 teaspoon mustard seeds
1 teaspoon fenugreek seeds
1 teaspoon fennel seeds
1 teaspoon turmeric
1 teaspoon mild curry powder
1/2 teaspoon coriander seeds
1/2 teaspoon salt
Freshly ground black pepper
2 Cornish hens (about 1 1/2 pounds each), halved
1 cup olive oil
3 spring garlic cloves, finely chopped
2 small spring onions or scallions, finely chopped
2/3 cup dry white wine
1 tablespoon soy sauce
1 teaspoon Worcestershire sauce.


'Member me mentioning that I LOVE SPICES?


From saffron to lavender to coriander to plain old poultry seasoning mix, it's in my cupboard. You know what's not in there? Fenugreek. You know the only time I've ever even HEARD of fenugreek? Reading new moms blogging about breastfeeding. But I had never, ever come across a recipe that called for fenugreek until the New York Times ran ours. I was not able to find any fenugreek seeds in a timely manner, so our recipe will proceed without them. Ditto with the bird's eye chili pepper (whatever that is), although it's optional anyhow. My other difference from the paper's recipe: We have two whole hens already frozen (now thawed), so I will be doing the splitting myself, Blog help me.

Let's start with the first sentence of the recipe itself:

1. In a spice grinder,

Okay. In a what, now? What makes you think I have a spice grinder? Ironically, this recipe was published in the same NYT Dining & Wine section as THIS article on ridiculous ingredients or instructions that stop some cooks from using a recipe altogether. Is this irony intentional, or am I merely a twenty-something in a small apartment, and therefore not the target of the NYT Dining & Wine folk? Because at this point, we're supposed to have fenugreek AND a spice grinder. Oh well. Moving on... I'm going to use a coffee grinder, and assume that that will work just fine.


Here's where your experience may differ: You may find that your coffee grinder is NOT coated with something your husband ground up in it about a year ago, and NEVER CLEANED OUT. You may have noticed this earlier had you not gotten so lazy about using freshly ground coffee beans. Lose 20 minutes cleaning (above pic obviously taken afterward), then wondering if you will electrocute yourself when you plug it in and try to run it, because... it's electric? And you just cleaned it with water? Dry as thoroughly as you can (also, you are now out of paper towels and have gone to Q-Tips to get into the crevices), but obsess about this electrocution business, because there's still a little condensation on the cap of the grinder.
So, the coffee grinder is clean AFTER 20 MINUTES, and the herbs/spices are assembled. We're coming up to my favorite part of this recipe: No chopping (or, light chopping; some chopping for onions later). I doubled the herbs/spices after I accidentally put in a tablespoon of mustard seeds instead of a teaspoon. You know I like over-seasoning things anyway, so, WIN! Now, put the mixture of herbs in the coffee grinder, or whatever you're using, plug it in hoping that the soles of your flip-flops are rubber, and grind -


Success! You are not dead or in cardiac arrest from electrocution, and you have a "coarse powder" of herbs and spices! More WIN!

SO. Hen-splitting time. It's time to deal with the fact that this used to be a relatively cute, fluffy animal, and split the ribcages from front to back. Also, big knives + slippery chicken skin = heightened risk of chopped fingertips. Gah. (Also, I'm pretty sure this is not the knife I'm supposed to use.) Here we go:


Yet MORE win! No fingertips missing, and you now have four halves of Cornish hen! Just so you know, the most unsettling part is the sound of cracking bones. Like a... well, like a set of tiny cracking ribcages, really.

Rub the spice mixture on the hen halves, then pour on olive oil, "turning to coat." I'm using 1/2 a cup instead of a full cup, as that's all that's left in my kitchen! Unsurprisingly, it is more than enough to coat the birdies. Now cover up, pop in the fridge, and... do something else for three or four hours. My personal choice is to take a shower. It's almost 100 degrees out today, and I left the apartment for all of ten minutes, leaving me pretty much drenched. This is one of the few days in my personal experience that can be unequivocally described as "oppressively hot."

Of course, showering only takes 10 minutes, 30 if you count makeup and hairdrying as part and parcel of a "shower." So... You put the hens in the fridge to marinate at 3:00. What with one thing and another, an hour and a half passed [name that awesome book/movie (although this line says "three years" instead of "an hour and a half," and isn't in the movie)]. Now you still have at least another hour and half to go. Why don't we go ahead and make the basting sauce a little early? Why not, right? Because the onions might become soggy in the soy sauce, you say? Well, forget you; they'll get soggy when they roast. So there. Stop being so difficult.

I could not find spring garlic, which is essentially garlic greens, according to Whole Foods' website. I will be using just a bit of garlic powder, hoping that will make up for the difference. Whatever. Here's a picture of an allium plant from the park near me to distract you: (Allium is the onion and garlic genus.)


I DO have scallions. This recipe only calls for two, so make sure to use the rest of the bunch in a salad for later: A wasted scallion is a tragedy.

So here we have our basting sauce:


I have a sneaking suspiscion that I was supposed to chop the scallions more finely, but, again, whatever. (Can you tell that heat makes me apathetic and lethargic?) However, I am happy to report that, while back in the kitchen slicing the scallions, my olfactory senses played host to a wonderful aroma of Indian/Moroccan/Italian spices. Heavenly.


Time to take the hens out of the fridge and pre-heat the oven! The actual cooking won't take too long, so you may want to go ahead and cook your couscous now (it will stay hot) if you're like me and can't so much "multi-task" as "burn everything." Here we go!


I don't know about Courtney's neck of the woods, but here in NYC, a HUGE downpour of atmosphere-cooling rain just started right on cue with my cranking up the oven to 400 degrees. Merciful. So, the oven is heating and the hens are waiting...


As you can see, our sous-chef takes exception to the use of so many non-feline-friendly spices, rendering him ineligible to sample this dish. He is not shy of demonstrating his displeasure:


While the hens are cooking, you shouldn't ignore any strange burning smells. It may be the bottom layer of your couscous burning. Because you can't cook rice-like dishes without burning them, as previously stated, about 85% of the time.


After 25 minutes (we're cooking some chicken breasts along with the hens, for eatin' later this week) (also, our hens are slightly larger than the recipe calls for) of cooking the hens in the top third of the oven, start basting! Before you baste for the first time, eyeball the juices coming out of the hens to see if they're starting to turn clear-ish. They ought to, by this point. If you're super lucky, you may even burn your thumb while cutting into the crease between the thigh and the body to check the juices, just like ME! Twice! (For real. 400 degree steel on the skin? OUCH.)


The paper's recipe calls for two bastings during a seven minute period, but, again, just eyeball it. When it looks done, take the hen out of the oven and let it sit for about 10 minutes. Mine are taking a little longer, by that timing, probably because of the size and extra meat in the stove. Correction: Make that a LOT longer. So far, I put the hens and chicken breasts (in different pans) in for 25 minutes; then 5 minutes. Then I took the chicken breasts out, mostly done. I set the timer for another 5 minutes. I just checked them again. Still not done. This leads me to conclude that Cornish Hen Is Tricky. Courtney will be familiar with this particular theorem, as she witnessed a similar timing debacle on Easter weekend. I'm beginning to suspect that my oven runs cooler than it purports to... and that it's a good thing that Kenny ordered Chinese food for himself tonight. So, we're waiting... we're waiting...


We're filing our nails... we're waiting...

And, FINALLY, WE'RE DONE!


(I think a good way to eyeball this is to let the spices and onions and stuff get nice and browned before you cut into the thigh to check the doneness for the first time.) (Also, I'd like to point out that the flash renders the change in color almost indecipherable. In real life, these are a nice, toasty brown.)


Let's dig in! Most important taste revelation: I'll admit that I was skeptic about a basting sauce that combined Worsterchire sauce and soy sauce. I mean, who does that??? Well, smart people, apparently, because it smells YUMMY. Which is fitting, this being the Yum Yum Cooking Club, and all.


All in all, I solidly recommend this recipe, if you have time and a patient cooking/dining partner! And a sous-chef who won't give you the stink eye when he's not allowed to sample.

Friday, June 6, 2008

Courtney: Tacos de Pescado

You love tacos. You really do. You can't understand why anyone wouldn't. You have a waning bottle of Patron, and a sous chef with sympathetic feelings and a camera. He good.
Tonight (well technically last week, but you were lazy about getting the pictures) we will be making tacos de pescado, also known as fish tacos (stop giggling, okay?). These will be relatively simple, unlike overly-decadent Tex-Mex varieties and you will need the following:

For pickled red onion and jalapeños:
1/2 a red onion (halve the whole onion lengthwise, cut thinly crosswise)
3 whole, small japapeños (sliced lengthwise into strips)
1 cup of rice vinegar (though I imagine any vinegar would do...for reasons later revealed we ended up using white wine vinegar)
3 tablespoons of fresh lime juice (I would recommend 2-3 limes)
1 tablespoon of coarse kosher salt (not recommended for direct intake without tequila + lime)

For guacamole:
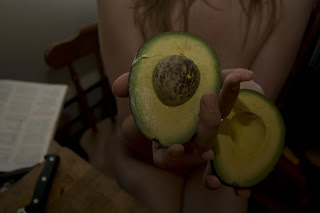
2 ripe avocados (fat ones preferably, otherwise I would recommend more. In fact, historians have recently disproved that nectar and ambrosia were the food of the gods, and that instead Zeus and the rest of the Olympians actually feasted on avocados and tequila with lime.)
The other 1/2 of your red onion (diced into very small pieces or your sous chef will redo the work for you)
2 cloves of garlic (minced)
2 limes
fresh cilantro chopped (this, as well as most things I do not really measure. I add what feels right. So go ahead, do what FEELS right. I'm adamant fresh cilantro be used. Fo' real.)
salt and pepper to taste

For fish:

1 cup of buttermilk
1/4 cup chopped fresh cilantro
1 1/2 tablespoons hot pepper sauce (be careful of this around small children, pets and your orally-fixated sous chef)
1 1/2 teaspoons coarse kosher salt (divided)
1 lime
1 pound tilapia fillets (because it was on sale, but you may also use halibut, sea bass, striped bass) (cut into 1/2 inch strips)

Additional:
2 tomatoes (diced)
a package of little corn tortillas (ours had 12 inside and that was beyond plenty)
1 cup of self-rising flour (logically I would assume this means flour WITH yeast. We purchased some yeast on the side, but forgot to use it. Oops.)
Vegetable oil for frying
tequila (optional)
rum (optional)
Looza nectars (such as Banana, Passion Fruit, Mango, or all three) (optional)
clothing (VERY optional)

Pickled Onions and Jalapeños come first because they have to pickle:
DO:
Place onion and jalapeños in a heatproof medium-sized bowl.
Mix vinegar and salt in a small saucepan.
Cut your limes in quarters and juice those bitches to join their friends in the saucepan.
Bring your mixture to a boil, stirring until the salt dissolves. (This all should happen pretty quickly).
Pour over onions and jalapeños.
Let stand at room temperature at least 1 hour.
(If you'd like to make in advance, cover and refrigerate).
Drink a mixture of rum and nectar over ice while you cook.

DON'T:
Throw vinegar all over the kitchen and yourself accidentally.
Pout over spilled vinegar.

After you've showered for the second time and smell vinegar free AND have gotten over wasting the remainder of the rice vinegar on polishing the floor (and substitute it with white wine vinegar), it's time to get to mixing together your tilapia!

Tilapia town:

Mix buttermilk, cilantro, pepper sauce, and 1 teaspoon of salt in a large bowl. Juice your lime into there in the same fashion as before. Add fish fillets; toss. Cover and chill at least an hour.


INTERMISSION!!

You have an hour now. Your tilapia's a-brewin'; your onions and jalapeños are stewing in their juices. What are two chefs to do??

FIRST:
Take shots! Open wide. Insert tequila.

Get it all in there!
I recommend a lime, not an avocado.

SECOND:
So now you've done a shot, but there is still so much time left to squander. While you do a quick perusal of your closet, your sous chef should take the time to search for stripper-esque music on Pandora. Then, be sure to give your sous chef a strip show on your coffee table in a spur of the moment school girl outfit to thank him for all his hard work.

DO:
Brag that the skirt you are dancing in was purchased in high school.
Rock out in your silver pumps with red argyle heart socks on.
Have fun and put on red lipstick.
Give your sous chef a perma-grin.

DON'T:
Feel it necessary to mention that the skirt doesn't really fit you that well (the point is you can get it on and it's still below your belly button).
Forget to give you sous chef the $10-spot you owe him for your share of the supplies.
Knock over your drink. (I know, again??)

OK, approximately an hour should have gone by during all these shenanigans. You should probably return to making dinner now. What are you doing? Stop that! Well...okay...

Tilapia: the sequel:

Whisk flour and remaining 1 1/2 teaspoon of salt in a medium-sized bowl. Add enough oil to a large skillet to reach the depth of 1 inch. Heat the oil until thermometer registers 350˚F. (Your sous chef is doing this while you prepare the guacamole, so you're not really sure how long he waited for the oil to heat. Also, you don't have a thermometer as far as you can remember...hell, you don't even have a full set of measuring cups...later your sous chef informs you he's not very good at frying things. Realize you don't really care. You have rum in your non-stirring hand and it all smells awesome anyway.) Working in batches, remove fish from marinade and dredge in flour. Carefully add fish to skillet, cover partially, and fry until golden brown, turning occasionally, about 4 minutes. Transfer to paper towel lined baking sheet to drain.

Guacamole, mi amore:

So you've given your sous chef the task of frying fish because you LOVE making guacamole. I like to get the garlic chopping out of the way first. Slice each clove thinly and then let your knife walk all over those little slivers. Your knife was made for walking. I promise. Mince finely and toss into yet another medium-sized bowl (you apparently have an ARMY of these, or like me keep washing out the same 2).

Dice your remaining red onion 1/2 and throw in.

Now it's time to have your way with the avocados. Slice around the pit with your knife in a circular motion. Take each half with one hand, twist and pull apart. Marvel at how good you are at picking out avocados. Repeat with second avocado. Now for the pit.
Carefully hack your chef knife into the pit so it's in solidly, twist your knife like deadly little Miho from Sin City and pull. Discard into the trash. Repeat.

Slice your avocado halves lengthwise and crosswise into the shell so you have a checkerboard pattern when you are done. Think about Tetris for a minute as you push the avocado out of the shell from the bottom into the bowl. Reverse Tetris.

When you have all that goodness in the bowl (feel free to use a spoon to help you) coarse chop your cilantro (or more finely according to preference) and juice those limes. Grind in some pepper (I used regular ground black pepper and also fresh ground mix of many colored peppercorns) and salt to taste.

Mash with a fork, or your favorite mashing utensil. Don't be afraid to taste as you go, adding lime, salt, and pepper as needed. Take your time. Your sous chef has all that fish to make (because you are doing this while he is slaving over the stove).

I prefer my guacamole to have a lot of avocado chunks in it, instead of being really smooth like store-bought brands. Avocado is really amazing, but once I put it in my hair because I heard that was supposed to be a good thing to do. It really wasn't. My hair felt really dried out and I got slightly panicked. Technically, it makes no sense to me. Avocado oil? How was that missing from this equation? It seemed like a model avocado...

Anyway, quickly pop your tortillas into the microwave, separated by sheets of paper towels. Zap them for 30 seconds.

Voila! You are finito! Now you can take it directly to the mouth and taste it, much like this instruction manual for eating ranbutans. Following this recipe will make more than plenty for two people.


Monday, June 2, 2008

Ali's Kitchen: Sauted Soft Shell Crabs

Welcome back, culinary swashbucklers! (I don’t know where I got that, but I’m sticking with it.) Before we get started, two announcements: First, we have an exciting new addition to the kitchen, though we won’t be using it tonight:


Say hello to Mister Toaster! (Again, just like Mr. Grilly, we're really imaginative around here.)

Second, when getting ready to cook, I discovered that our trash bag was… leaking. But I reeeally didn’t feel like cleaning and mopping and whatnot before cooking a whole meal, sooo…. Procrastination Powers Activate! Form of: A paper towel! And flip-flops!

Tonight we’re having salad, (microwaved) baked potatoes, and... drum roll please… the fantabulous, succulent, in-season wonder that is SOFT SHELL CRAB.

It’s important to remember the following commandments when cooking crab:
1. Thou shall not mask the natural flavors of the meat with too many seasonings or spices, lest ye completely defeat the purpose of making crab.
2. Thou shall not overcook the crab, thus rendering its fabulous texture rough and chewy.
3. Thou shall avoid frozen crab at all costs, NAY, UPON PAIN OF DEATH… or if not death, then at least disappointment.Those are pretty much the basics. Go for fresh crab, don’t bombard it with all sorts of flavoring, and for the love of Blog, don’t overcook it. With that in mind, let’s get started with our materials:


First things first: The crab.


Sorry, little crabbies. You were too tasty to live.

Second things second: All you need is some olive oil or butter (or substitute); some flour (if sautéing); and some salt and pepper. You can also serve this with lemon wedges if you have lemons around (we don’t), and if you like lemon with your seafood (I don’t). Also have on hand: a large plate; and a large frying pan or roasting pan, depending on if you want to sauté or roast/broil. FYI, we’re working with 8 rather small crabs. We’re using an amalgam of recipes ranging from The Joy of Cooking to Epicurious to some random website.

Before you get rolling, go ahead and throw together your side dishes. Hopefully you’ve chosen simple ones that can be prepared ahead of time, or you have a sous-chef with opposable thumbs, unlike some of us:

Wut? Am prolly smarter than u, human.


… The point being that you’ll want your full attention for the crab, so as not to violate the third Crab Commandment. That being said, the actual cooking bit is relatively easy. (Side note: Since we’re having potatoes, I went for our sour cream, only to discover it was no longer sour cream, to be precise, but something… blue.)

To sauté: Get the pan nice and hot; sprinkle crabs with salt and pepper to taste; sprinkle some flour onto the large plate and coat the crabs well; and sauté in the pan with a little oil/butter/substitute until golden brown. Traditional recipes will tell you about 4-6 minutes per side:


According to them thar recipes, you should get ‘em good and red, and firm. To roast/broil, preheat the broiler or set the oven to 500 ̊, brush the crabs on each side with melted butter, and sprinkle with salt & pepper (not so much with the flour for this one), and cook without turning for about 10 minutes (according to The Joy of Cooking, hereafter, TJoC).

We’ll sauté, since it’s more fun to photograph. Here we go:


Your crabs are ready to go! They’ve been sprinkled and floured and your butter, etc., is melting in the frying pan. Let’s pop those babies on!

This part is pretty much your basic eye-it-as-it-goes. After 3-4 minutes on the first side, we flip them. After 4 minutes on the second side, we remove them from the pan, and straight to the plates, where the potatoes, they will freely admit, were starting to feel lonely. Now let’s see how this all came together…


As you can see, the claws turned red almost instantly! To keep the crab from sticking to the pan, but still keep the pan hot enough, I added small dabs of “butter” as we went along, tossing the crab about like a pancake. This worked well, and I still ended up with a minimal amount of oily product.I had NO idea how to eat soft shell crab. Google revealed that I was in good company. Apparently, you’re supposed to eat the WHOLE THING. ... Which will look approximately like this:


Here are the Discoveries I had upon eating:
1) WHY DID I NOT FOLLOW MY LOBSTER RULE?! Said rule: This thing just came from salt water, so it doesn’t need added salt. WHY? WHYYYY??? I added just a bit of salt, and lo, the crab was waaaay too salty. This was relatively easily remedied by peeling off the body shell, but I would have liked the whole “whole crab” experience.
2) … Or maybe I wouldn’t have liked that. I found crunching on the shells to be reminiscent of, well, descriptions of cannibalism in various novels. And don’t get me started on eating that bluish-green part in the middle.
3) The cleanup for this meal is going to be really, really easy.

In short, this was a fun experiment, but I think I’ll stick to steaming fully grown and shell-hardened blue crabs in future. Though I’m pretty sure we had at least ONE fan in the house:


nom nom nom

Ali's Kitchen: Hilarity Ensues While Grilling Chicken

Hi. We got some new patio furniture.


In New York City, a porch is what's known as a "Big Deal" because it can function as sort of an "Extra Room" and therefore as "Bragging Rights." Ergo, we were Terribly Excited about our Big Deal Extra Room's New Look. So excited that we got a grill. You know the kind: The baby grill that's not even as high as your shin and has about a 14" diameter? This kind of grill:


We've decided to call him Mr. Grilly, because we're creative like that. For Mr. Grilly's inaugural cookout, we selected some nice Perdue skinless boneless chicken breasts and what turned out to be the Best Barbecue Sauce Ever (if you like the non-spicy kind and tend to break out in hives when you're around anything less mild than mole sauce):


Keep in mind, I'm not what you'd call a BBQ expert, though I pretend to be around Northerners who don't know any better (ha HA - serves them right for someone actually asking me if Georgians wear shoes during the summer, and for everyone being astounded that I don't have an accent).

Now, this is where everything went wrong: sometime between marinating the chicken and putting a match to the charcoal in the grill. It took us THREE HOURS and very near a spontaneous divorce to get the damn thing lit. I'm still not sure what we were doing wrong, but sometime during the evening, we gave up and ordered pizza.

Then, as I was reading about Henry VIII's children and waiting for the very late pizza, I sniffed the air and realized ruefully that SOMEONE in our building was indeed grilling successfully. Then I sniffed again. And again. And had a hunch! And went out to our porch extra room! And the coals! They were red! And hot! And the chicken! I put it on!! And grilled it!!


And then I, personally, ate pizza, because damn, it was enough with the chicken already.

K, however, had the chicken, as did our sous-chef, and the general consensus was:


(Please note sous-chef perched in the corner, supervising dinner.)

I have no idea what we were doing wrong with lighting the grill, because last night we grilled again (turkey hot dogs) and all went without incident. I just don't know.

**********************************************************

I waited to post this one after at least a solid week of grilling to add Things I Have Learned:

1) I now know what one needs to do on a dinky little grill like this one: Mix it up about 60/40 Matchlight and Traditional charcoal, stack in a vague pyramid (thanks to Courtney), and light from the bottom. ALSO, it helps to take out the lower grate in this kind of grill, thereby giving you more space for more coals, and therefore more heat! Et voilà: A dinky but hot grill that can cook for at least two hours.

2) For the love of Blog, insist that your husband not light the grill without one of you cleaning the grate(s) first. Otherwise? SMOKE. STINK. WOE.

3) I now live for turkey hot dogs and turkey burgers. This could be problematic for bathing suit season.

4) While it's too cute to have a husband who's into grilling, don't be surprised if husband/boyfriend/male companion won't actually use tips you've figured out, like the take-out-the-second-grate-for-more-coal-space thing. He is a Man. He is impervious to suggestions, because he wants to be a Grill Master. Be sure to give credit where credit is due, such as an improvised habanero marinade for some chicken cutlets.

5) It's difficult to grill ground chicken burgers, as they aren't as cohesive as ground beef or ground turkey. They will drop through the spaces in the grate, thus creating much Smoke and Stink and Woe (again), and forcing you to order backup pizza (again).

More grilling escapades to come, I'm sure!